
This article takes you on a “tour” of the puppet factory premises as it existed in the 1960s and 1970s. We will explore each room or department and explain the puppet making process from beginning to end.
Introduction – The adventure begins!
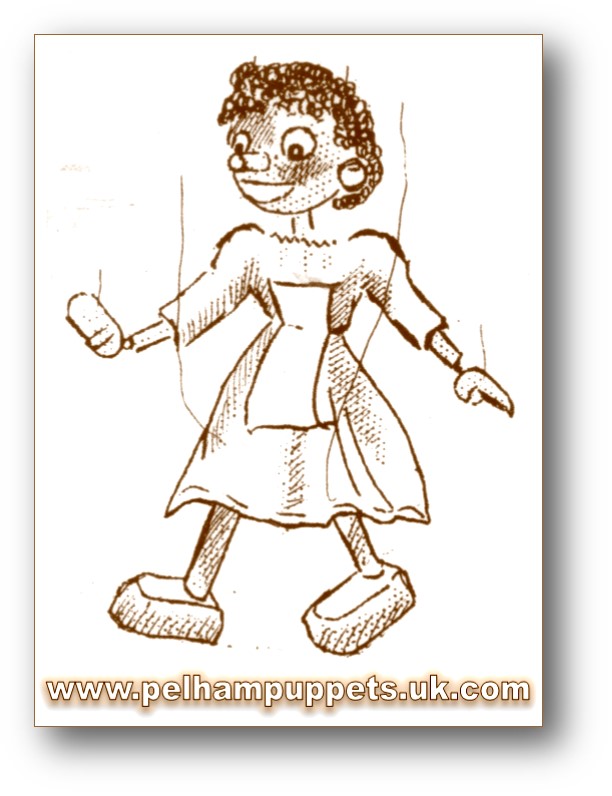
The first puppet that was brought to life was called Chloe. She seems rather crude by today’s standards but she had a charm and appeal people can still appreciate.
This is how Bob described her creation: “She wriggled and kicked as excited hands tried to dress her and attach the strings. A moment later she was flinging her arms about and leaping in the air! She was alive and how happy she was! Then she stopped and for a moment, she thought… then in a loud clear voice she commanded, “Make thousands, nay, tens of thousands!” She said that children in all lands of this world wanted puppets like her to play with!”
 It all started in a small first floor two-room workshop in Silverless Street, when Bob Pelham began his Wonky Donkeys. The puppet making began in 1947 after he relocated production to premises in Kingsbury Street.
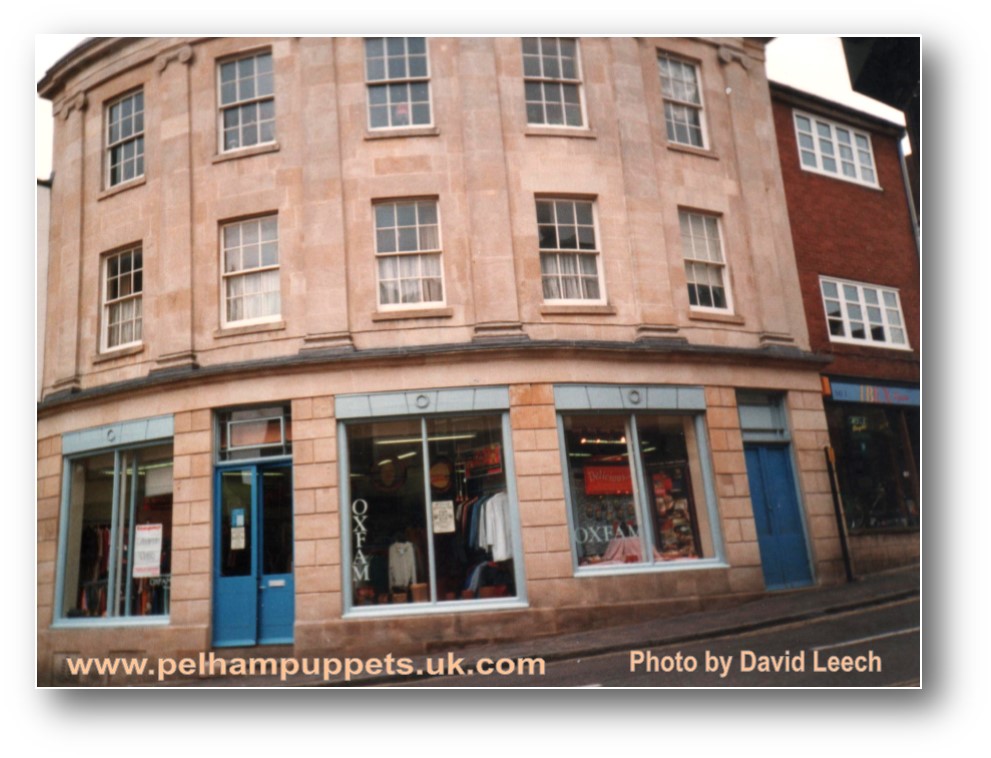 During the first year the only outlet for sales consisted of a shop in Victoria House at the bottom of Kingsbury Street. It had been a grocer’s shop before but when the puppets took over, the brightly painted building in cream and turquoise seemed to create a special kind of magic. Victoria House was certainly an extraordinary place to work. The unusual product they were manufacturing and the happy family atmosphere, created a feeling of group endeavour that formed the basis of the company for years to come.
More details about How It All Began HERE.
Following the 70th Anniversary Marlborough Puppetry Festival in 2017, I worked with Marlborough Town Council on preparations for a Blue Plaque to be placed on the building where Bob started the business in 1947. The installation and unveiling of the plaque took place on 28 February 2019. The photo above shows the premises where he started at the lower end of Kingsbury Street, Marlborough. The puppet making workshops were located on the first and second floors of the curved building and in December 1947 he opened a shop next door at No 3, since the ground floor of the main building was already occupied.
By 1951, production had increased and it became necessary to find larger premises in Elcot Lane and Victoria House became the home for the offices and the retail unit. The following year, Pelham was able to purchase a site in London Road and this became the long term base for Pelham Puppets until 1987.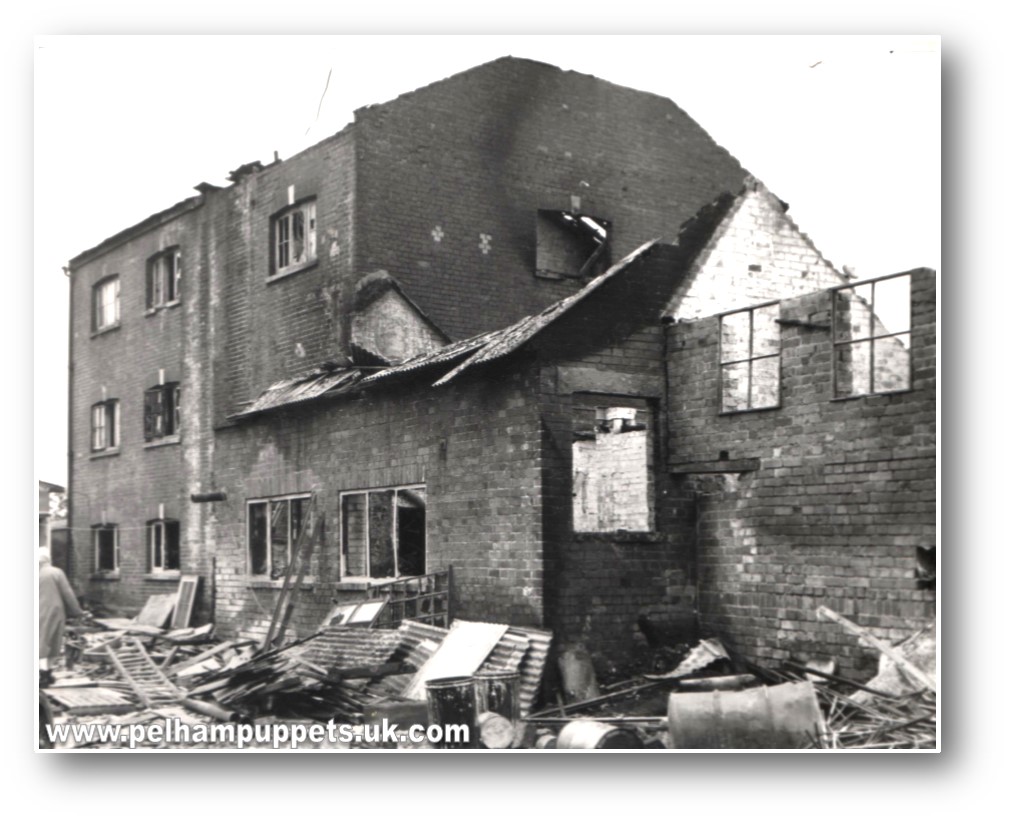
The original London Road factory was a three story building plus a former laundry building, situated on the south bank of the River Kennet. On October 18th 1961, the large 3-story building was completely destroyed by fire and huge stocks were lost to the flames.
 It wasn’t long before a new factory was built on the site. Additions were made to the existing buildings as production continued to increase and extra land was purchased on the north bank of the River Kennet.
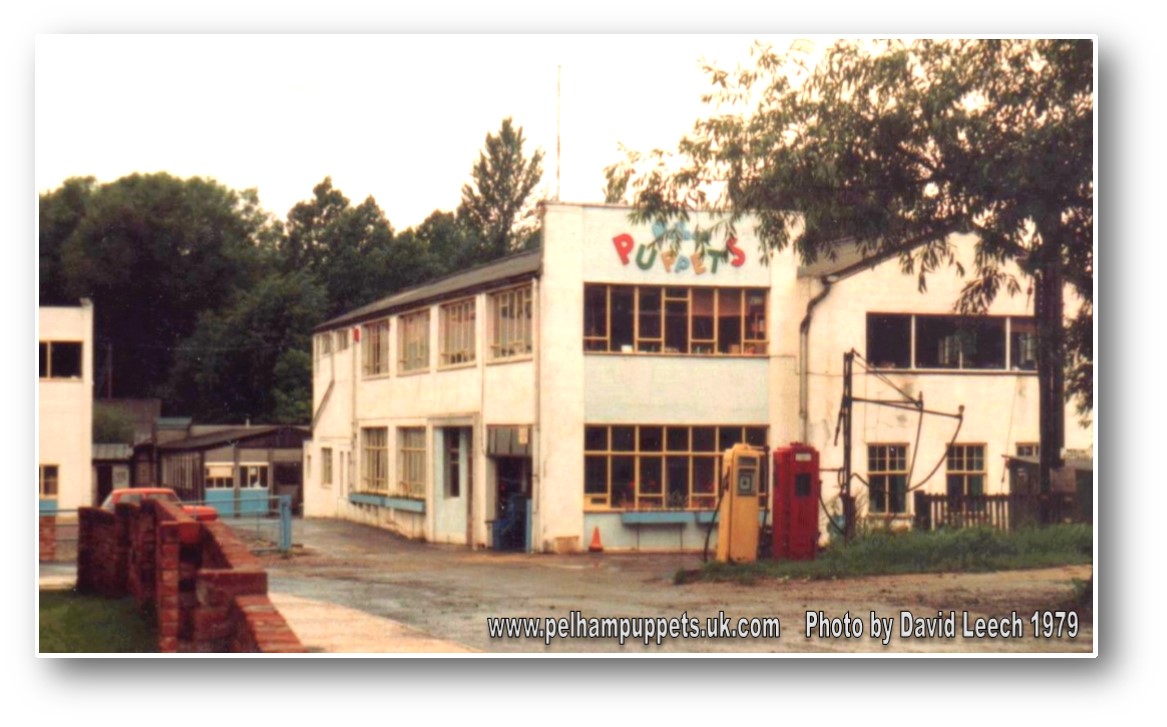
 This area was connected to the main factory site by a foot-bridge built by Bob Pelham, and some of his employees! It was here, amid the quacking of ducks on the river and the tapping of hammers, humming of machines and the smell of coffee, paint and sawdust, that all the beautiful, puppet creations were produced! After the Company changed hands in 1986, the factory was moved to Collingbourne Ducis south of Marlborough and the London Road factory was demolished in 1989. The site is now called Pelham’s Court.
Photo right: Top image shows entrance to Pelhams Court today. Bottom image shows where the Pelham Puppets factory was located.
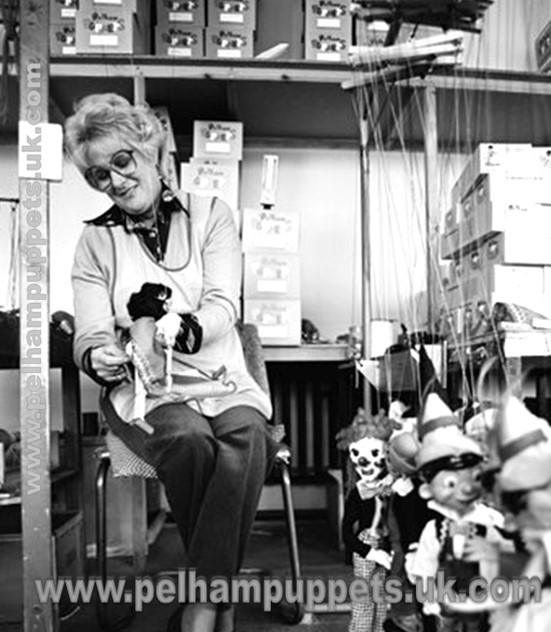
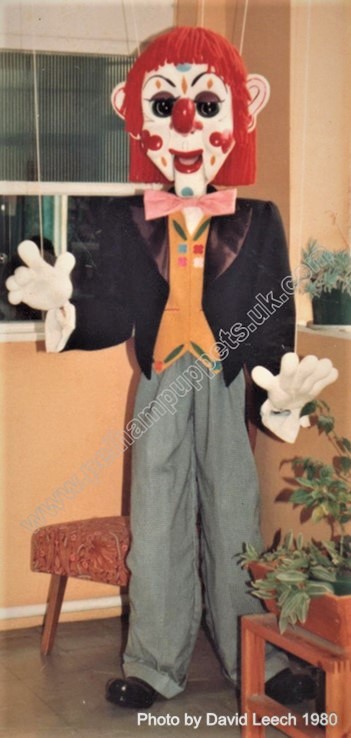 Upon arriving to the factory, one would be greeted first of all, by the life size Bimbo in the reception. One of the girls in the office would then call Mr Pelham who would, more often than not, appear from wherever he was working and welcome you to the factory himself and conduct the tour. On occasions, if he happened to be away or particularly busy, either Frank Lawton or Eileen Sims-Neighbour would be invited to show visitors around.
Usually, the tour would begin in the Stringing Room since that was nearest to reception (after the packing room) and visitors would be shown the production of puppets in reverse order, ending up in the Moulding Room then last of all, visitors would be taken into the Animated Hall where the animated displays would be switched on and you’d see the puppets in action. Sometimes Bob would put on a small performance with a puppet or two and if it were a school tour, sometimes he’d even treat them to a show before they were escorted back to where they first arrived.
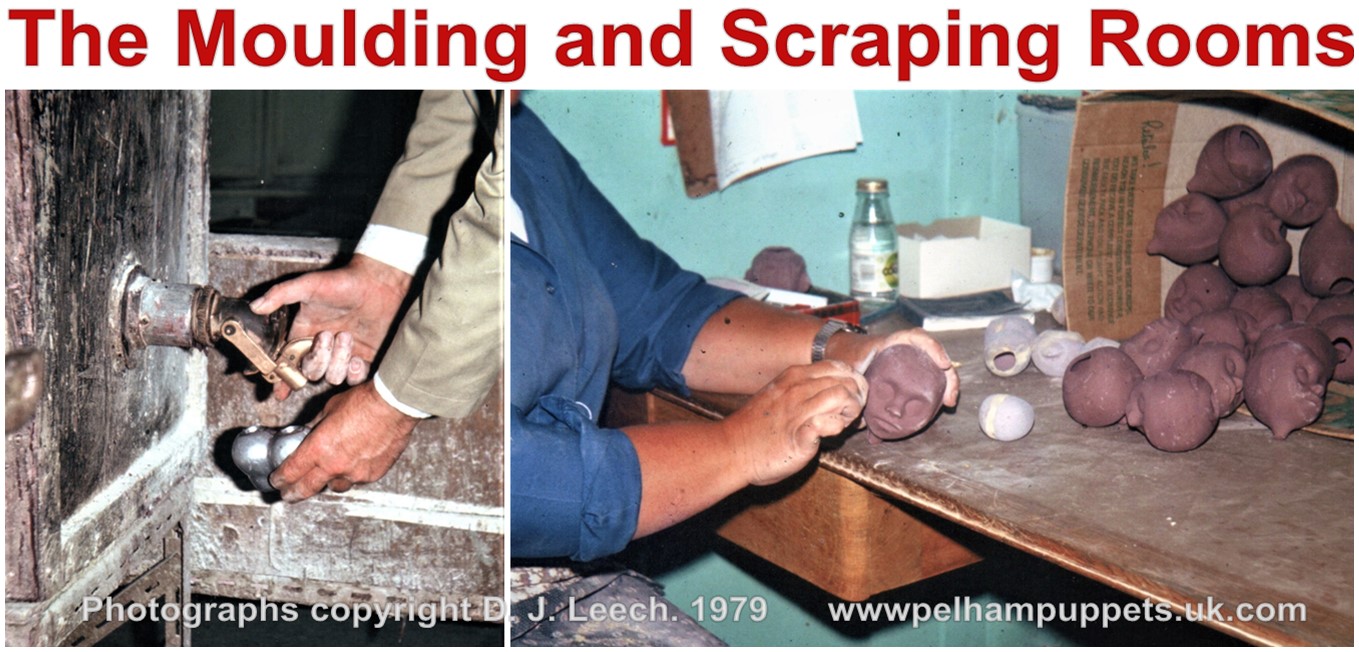
The material used for the moulding process consisted of pumice powder, finely ground volcanic lava from the regions of Mount Vesuvius in northern Italy mixed with bone glue, (gelatine) and water. There were two different types of mouldings, the solid, such as used for hands, feet and skeleton parts and the hollow moulds used for heads, animal bodies, hands and feet such as the boots for Bimbo and the Disney range of characters.
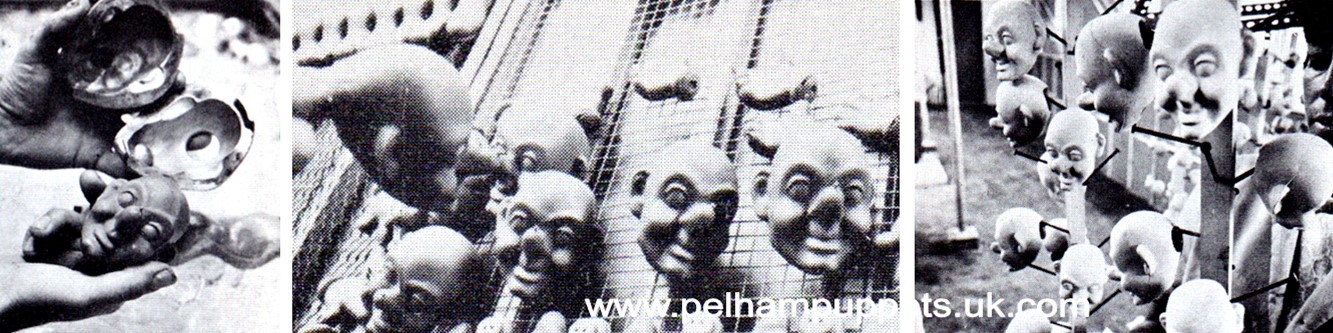
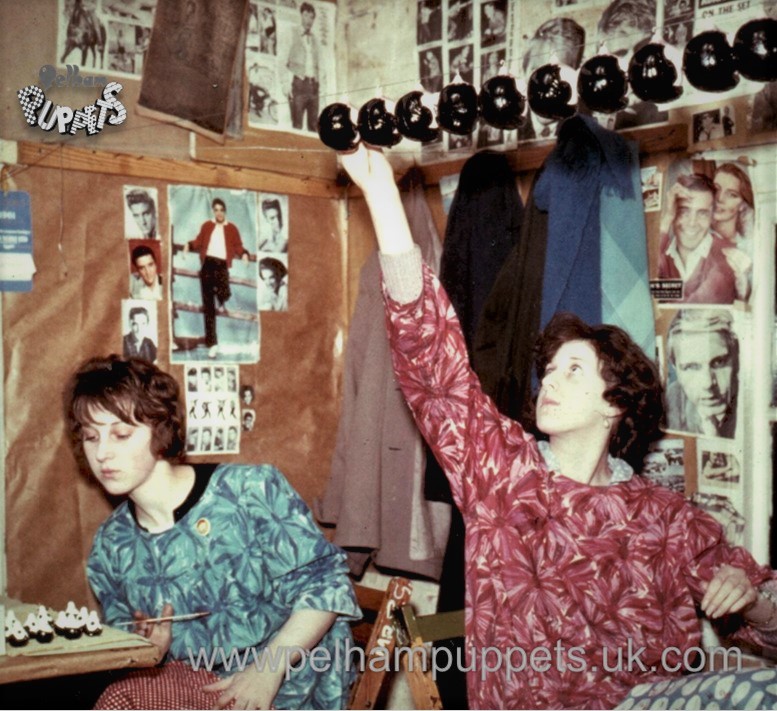
Above: The Mould is opened and a soft, cold, jellified head comes out. The heads are laid on a tray and then stored into a wind tunnel to dry. The next day they are hung on spikes and drawn up to the ceiling. By the next day they are hard and ready to be drilled, “scraped” and cleaned with sandpaper.
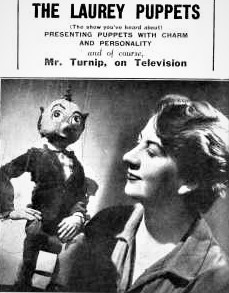
 Sometime in or around 1950, Bob was introduced to Percy Mortimer who had been working on a new moulding process during the war for use in the munitions industry. He had been experimenting with aluminium, which had been developed during the war, as a lightweight noncorrosive metal for use in the aviation industry. He produced moulds from this, into which he poured a mixture of pumice and gelatine to produce heads for dolls, and glove puppets. He was on the lookout for additional characters for his range of glove puppets and dolls when he came across ‘Mr Turnip,’ the television puppet by Joy Laurie in a children’s comic and it was through this connection that he and Bob met. Bob immediately saw the benefits of using this for producing more sophisticated character puppets. Bob would produce a number of sketches and Percy would then make up models of these in plasticine from which the mould could be made and casts taken. Although the moulding material was relatively light, the heads produced were solid and this made them a little too heavy for a working marionette. It took some time, but as Percy continued to develop the process, a way was found to make hollow heads that were both strong and very light.
 When Bob moved production to the London Road premises, he was able to make room for the moulding process to be carried out on site and eventually, he bought the process from Percy and together, over the years they developed and refined the production of moulds so that both solid and hollow components could be made for a whole new range of puppets referred to as the ‘SL Range.’
They were all produced in the Moulding Room, where the unique mixture of pumice powder and gelatine was first heated to forty degrees centigrade and stirred for about two hours in a large metal tank and then poured into the alloy moulds using a sugar tap. This was a special tap used in the refining of sugar and meant that sticky material running through it would not clog up the system.
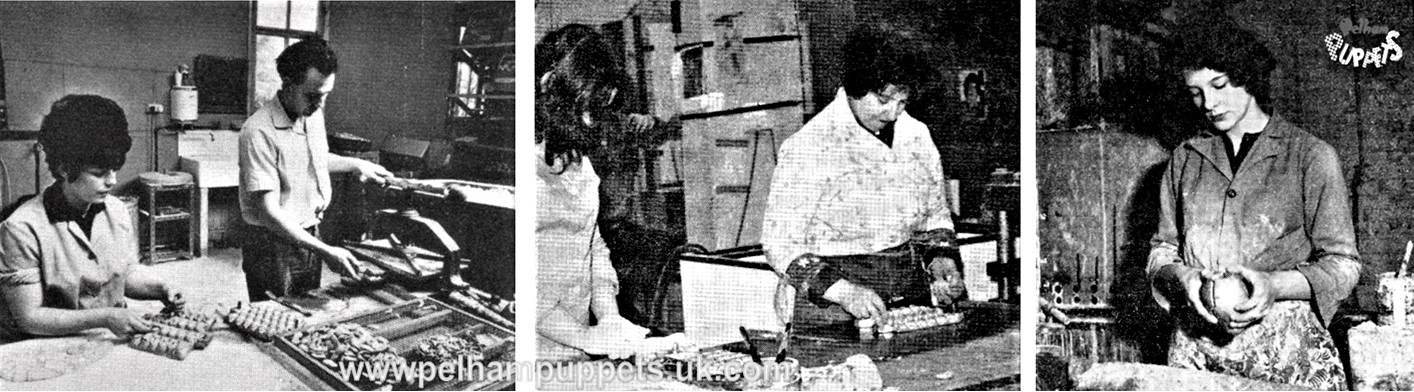
Photos above: Shirley & Ron Louth; (1961) Rosita Bright, Mrs Hands, (1973) Rose Kyle (1961). Photo below: Ron (1973)
 Once the mixture was poured into the mould it was immediately up-ended above the tank in order for any surplus mixture to empty out. This left a thin layer of mixture on the inside of the mould. After about ten minutes the cast had become hard enough to handle, at this stage it was like table jelly and had shrunk in size enabling its removal from the alloy mould. At this point wooden dowels were inserted into the necks and as the head dried, it would shrink further and the dowel would be permanently ‘glued’ to the mould. The casts had to be subjected to contrasting temperatures, so they were placed in trays filled with ice cubes to enable them to become solidified. Once they had solidified, the heads were then placed in a wind tunnel where they remained for up to twenty-four hours drying in a current of air provided by two large fans.
The photo shows Ron Louth pouring the pumice mix into a mould. Ron was 26 years old when he first went to Marlborough for two weeks to carry out some work for Pelham puppets because they were under pressure due to having received “large orders from the USA.” At the time he was working as a mould fitter for a Company that made mouldings for firms all over the country and as his expertise at fitting and polishing moulds grew he began to more and more work for Pelham Puppets on a regular basis. It was while he was helping a friend to move house around this time, that have Ron the idea to start in business as a Removals Man. He received financial help from Bob Pelham so he could buy his first van and he began to carry out removals on a part-time basis. He decided to make this his main business in 1975 and did moulding work at evenings and weekends. Even so, he became responsible for the managing the Moulding room and worked there when there was no call for removal jobs. He was a lovely character who was heavily involved with the Marlborough Lions Club as an adviser to the ‘Leos’ – the youth section of the Lions – and all the young people knew him as “Uncle Ron.” He had a great sense of humour and was good friends with Bob Pelham, (and he also took care of my house move when I left Marlborough in 1981!) He died in 1987 at the age of only 53.
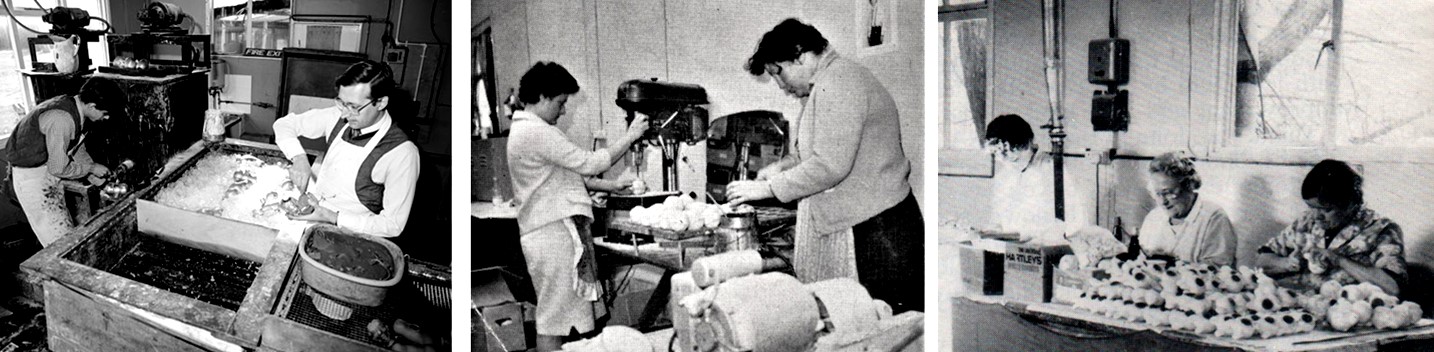
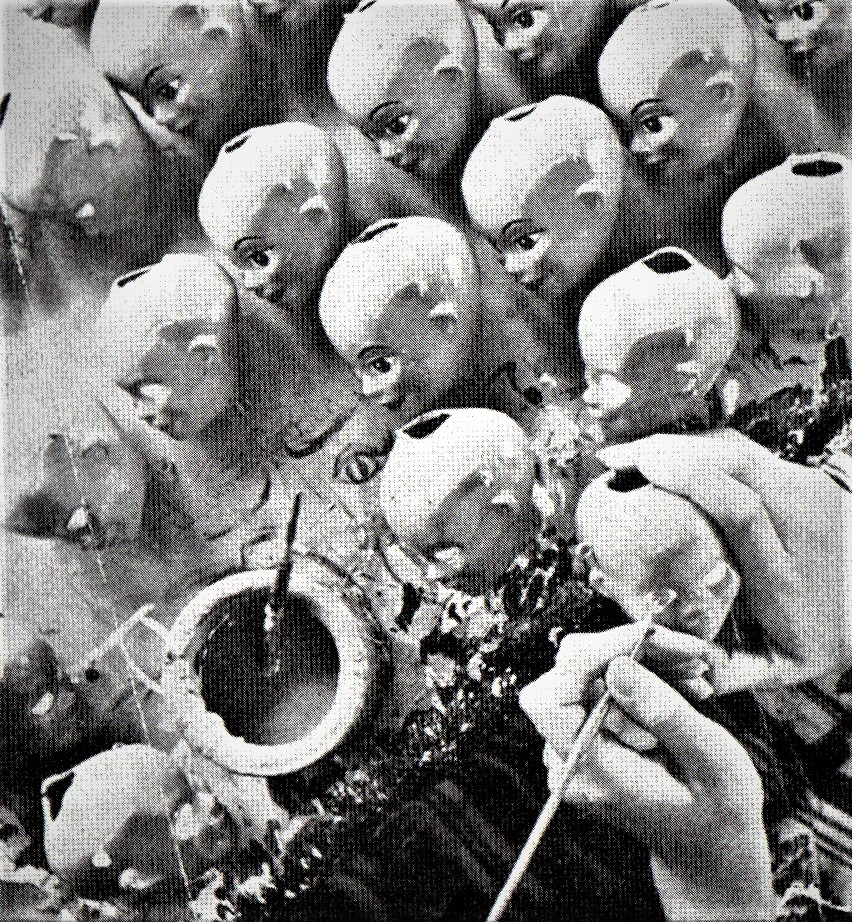
The mixture for solid parts was made into dough from similar material as for hollow moulds. Ordinary pellet glue and not gelatine was used since white mineral powder rather than the more expensive pumice powder was used and this dough was pressed into a flat-sided alloy or brass moulds. When these were filled they were placed under a hydraulic press which would exert a pressure of 1,000lbs per square inch. After these components had cooled and become jellified they were put into the wind tunnel to dry which could take anything up to ten days! When all the parts were completely dry, they were sorted into boxes and sent through to the next department, the Scraping Room. Very often air bubbles would have produced small craters on the surface of the head or face and these were filled with wood-filler and sanded until smooth. Every head, body part, hand and foot had to be checked and sanded by hand to ensure every component was as smooth as possible for the application of paint later on.
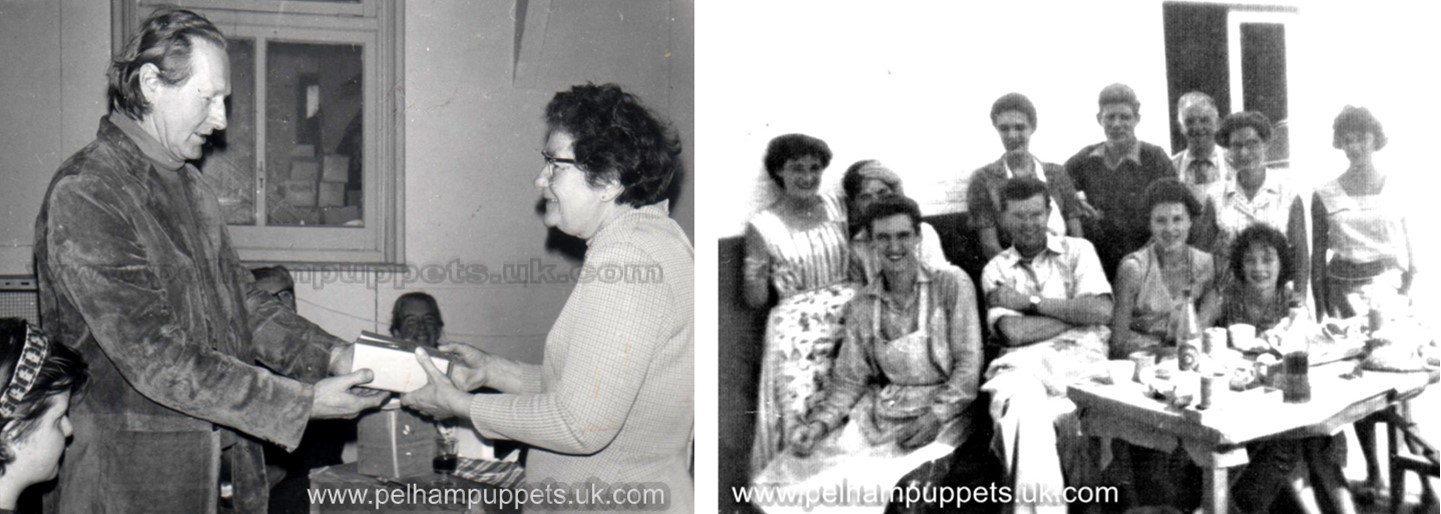
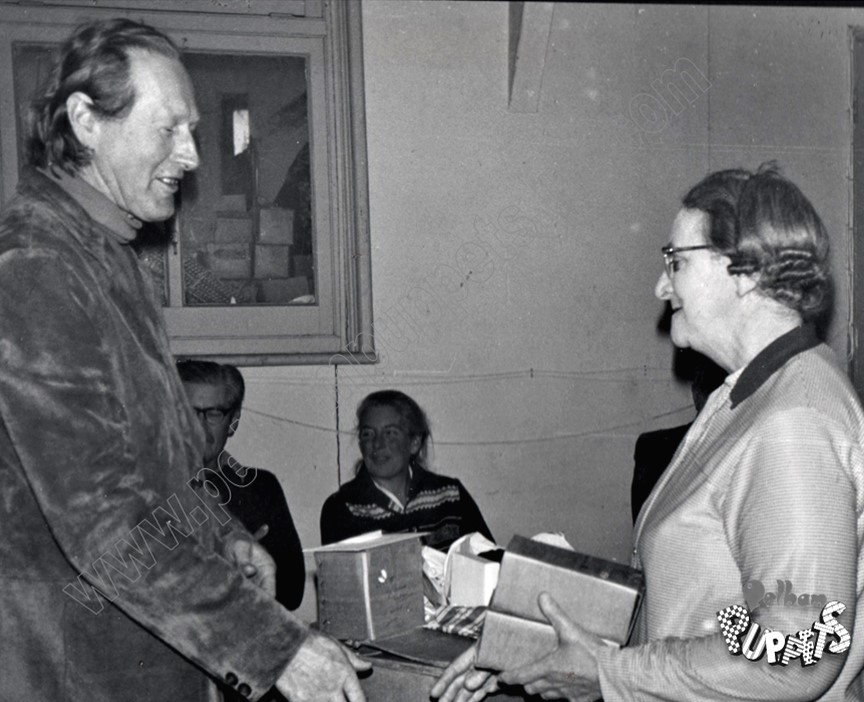
Photo Left: Mr Pelham (Dec 1977) handing Dot Dooley her anniversary gift in recognition of 25 years service. Dot, known as the “skeleton lady” worked in these rooms for most of her working life making skeleton parts. Photo right: (1961) Joan Mabbutt, Andy Ross, (part-time) Kelly Seymour, David Macey, Handel Collins, Bernice Miller.Jenny Waite, Rose Kyle, Eva Pratt, David Cowley and Alastair Ross (part time.)
Once this very dusty, labour intensive and laborious work had been completed, the finished heads and hands etc, were placed into boxes and taken over the footbridge, passing by the animated hall, on to the Dipping Room.
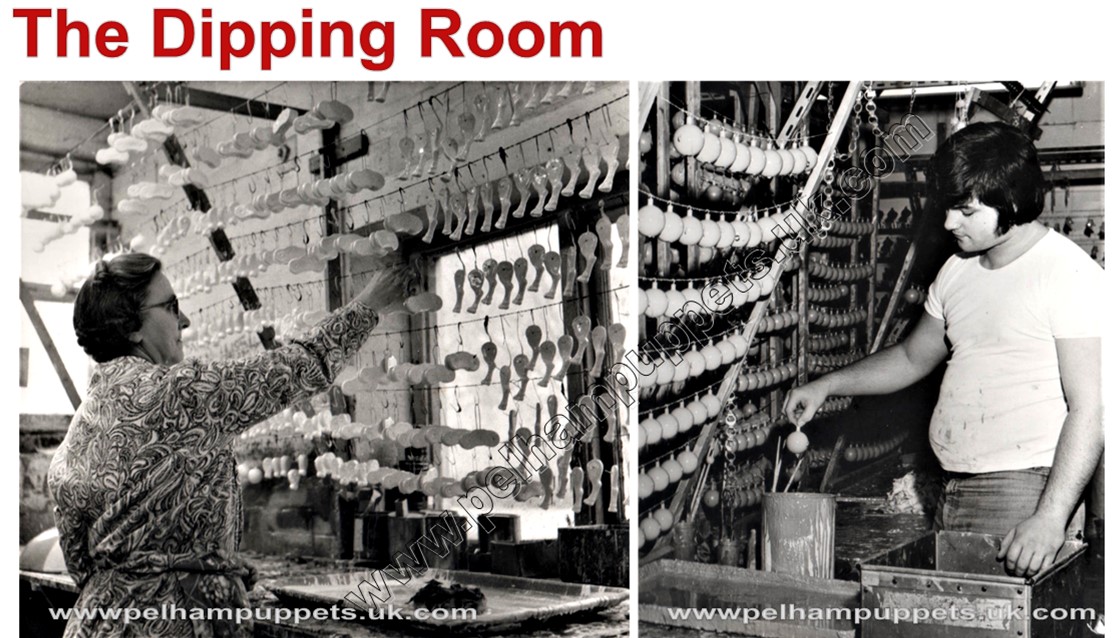
Photo above: Win Taylor dipping Muffin the Mule parts 1961. Right: Paul Upton dipping Type SS heads 1977. Paul started working for Pelham puppets in 1976. When he applied for a job at the factory Mr Pelham asked him what his previous job entailed. Paul repled that he had been a painter and decorator for the previous three years. Bob responded by saying, “I’ve got just the job for you!” Yes! Paul spent the next five years in the Dipping Room!
 Wooden heads, moulded heads, animal bodies were all simply dipped into large pots of paint and hung up to dry on purpose built racks. The surplus paint dripped into trays and was poured back into the pots. The important drip was always the last one. This had to be removed by a paint brush, not too soon or another would form and not too late or it will have become too dry to be removed without leaving a mark. An experienced ‘dipper’ could fill up to twelve racks a day, each rack would hold up to one hundred heads and if the job seemed monotonous, one could usually add some variety by dipping components that needed a different colour! Although it was fast drying paint, the heads were usually left to dry out overnight and were collected the following morning and taken to the head painter’s room.
Parts that were too small for dipping individually such as hands and feet were tumbled in a metal barrel, a tricky process, with just the right amount of paint – that was the tricky part – which was sealed and tumbled on rollers for several minutes so all the components were covered in paint. The contents were thrown out onto wire-mesh trays, separated using paint sticks, stacked and left to dry out overnight.
Photo above: Mr Pelham (Dec 1977) handing Win Taylor her anniversary gift in recognition of 25 years service. Win worked in the dipping room all of her working life.
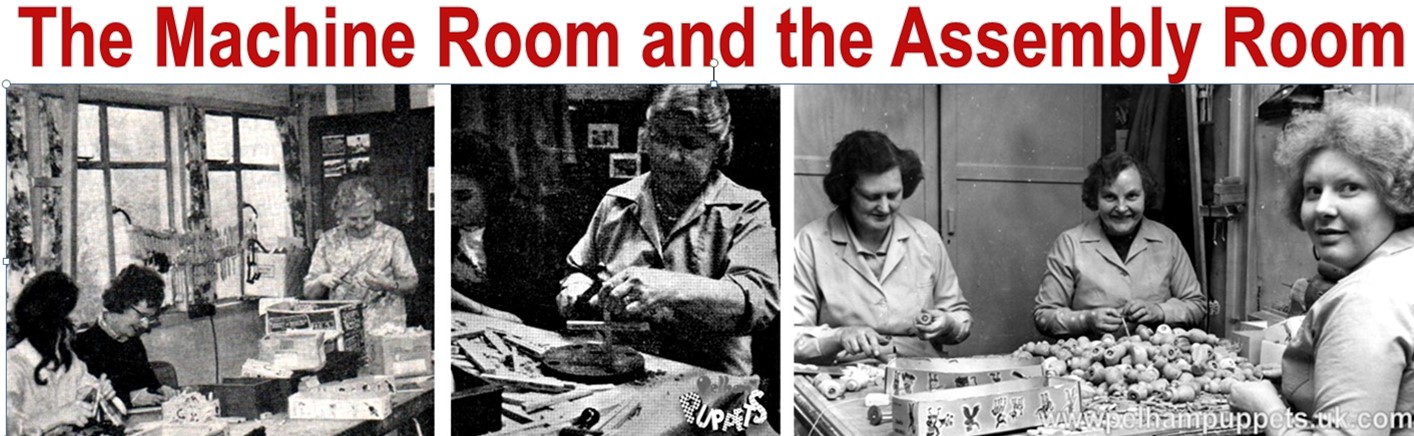
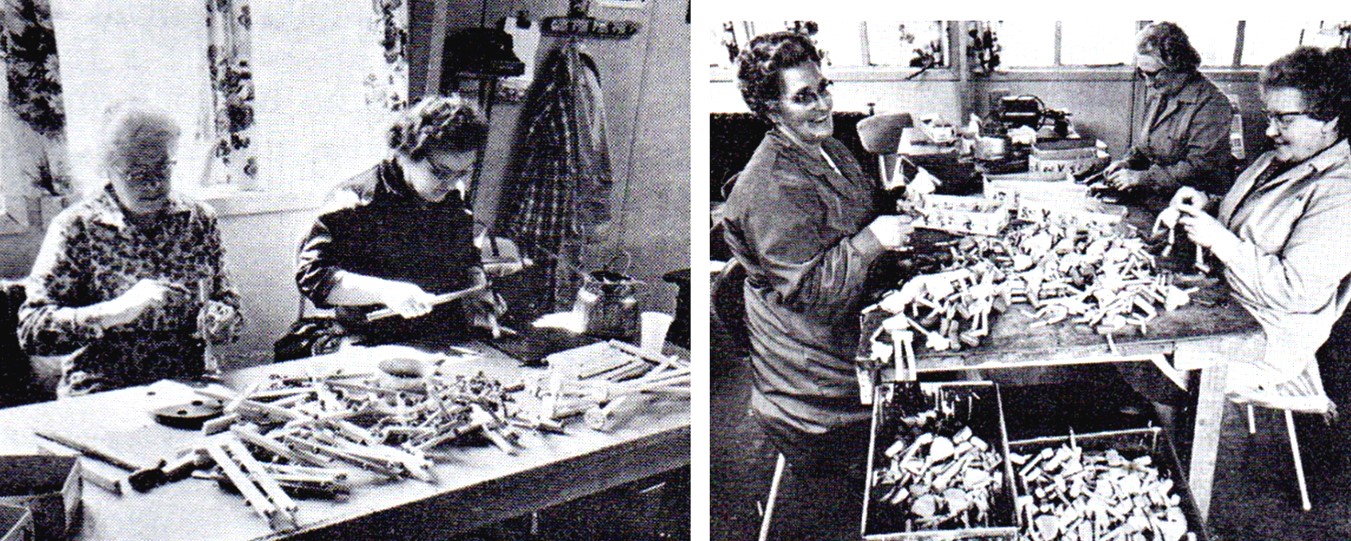
The photograph on the left shows Peggy Stroud, (standing,) and Edna Locke, (centre,) and they would work out from the weekly production sheets how many of each puppet are required. At this stage in the production, the only difference was the colour of the puppet’s feet, with the exception of what were referred to as ‘boots,’ actually lower legs, which were used for such puppets as the Pirate, and Gepetto. The middle photo is Fan Lanfear assembling the control bars (1961) and, right Iris Sheekey, Jessie Loney and Shirley Walker are assembling “Woodenhead” bodies (1965).
 The Machine Room housed a number of woodworking machines including three high speed bench drills, three circular saws and ingeniously designed jigs and purpose built drilling machines. All the machines were connected to an extraction system which collected the saw-dust which a local butcher would call in for, each week and take away to use in his shop!
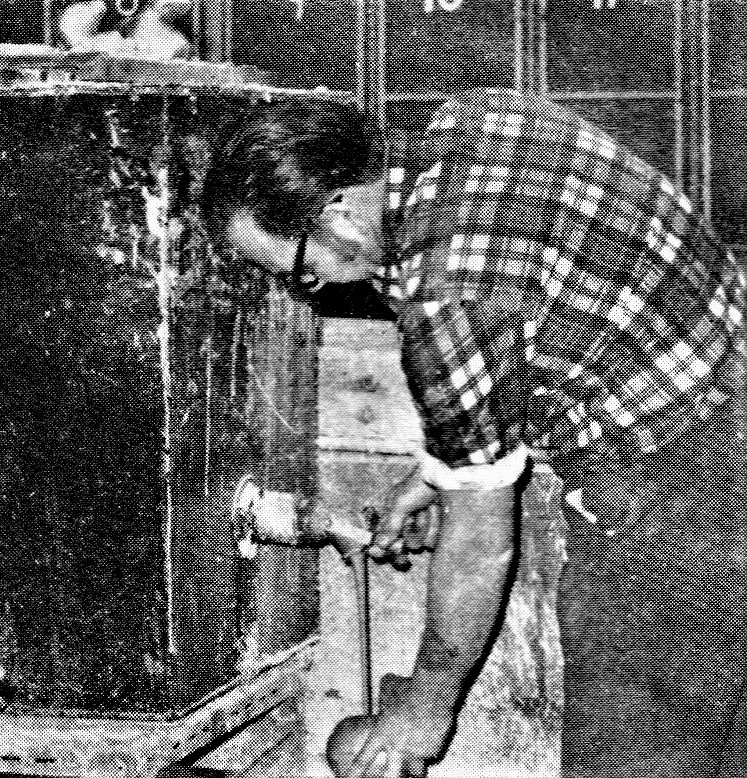
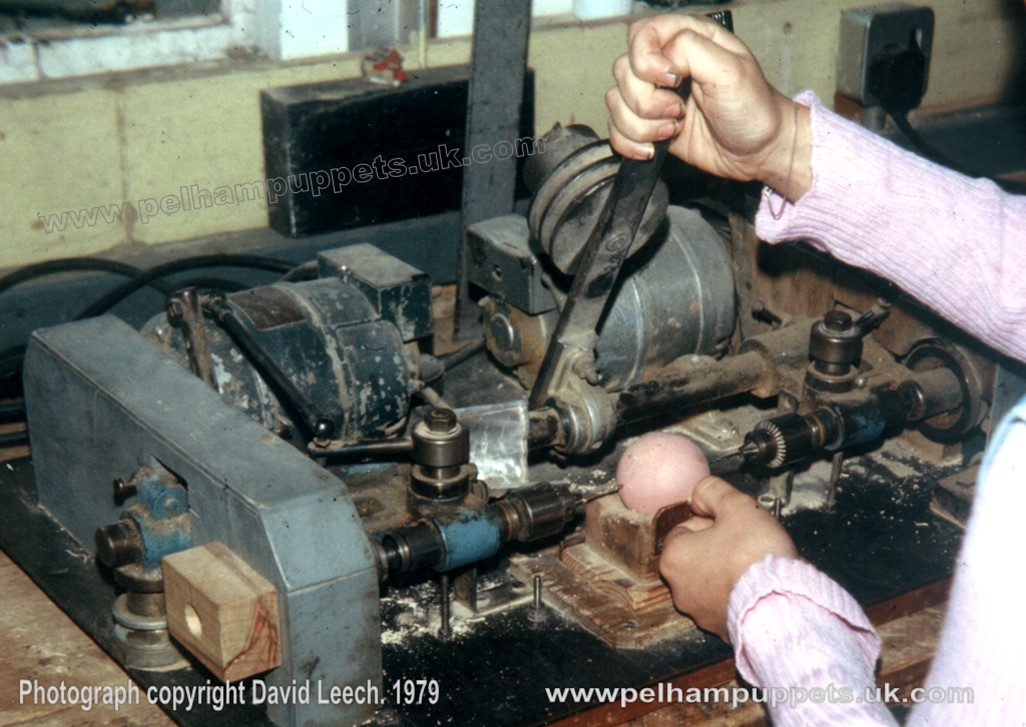
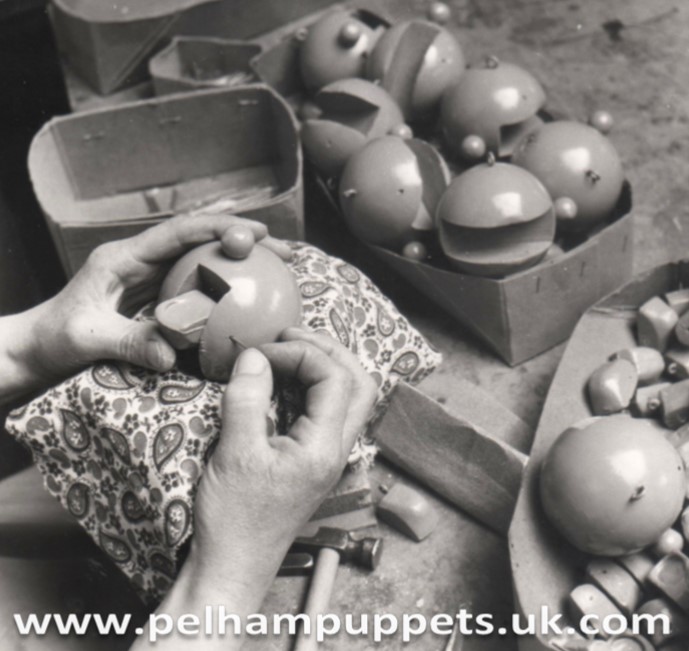
This is where we used to drill all the holes into all the heads and bodies for screw eyes, necks for the wooden-ball heads and various body parts were cut and sanded. The first stage in preparing the wooden ball heads for Type SS puppets was to drill a 3/8” hole for the neck to be inserted. After the neck had been glued in, the guide holes for the ears and nose were drilled. This was accomplished using a specially designed twin-drilling machine. The wooden ball was placed onto a raised jig, as seen in the photograph. The operator is lowering a fixed weight which was used to bang the back of the ‘head.’ A nail inserted in the centre of the raised jig marked the position for the guide hole for the nose.
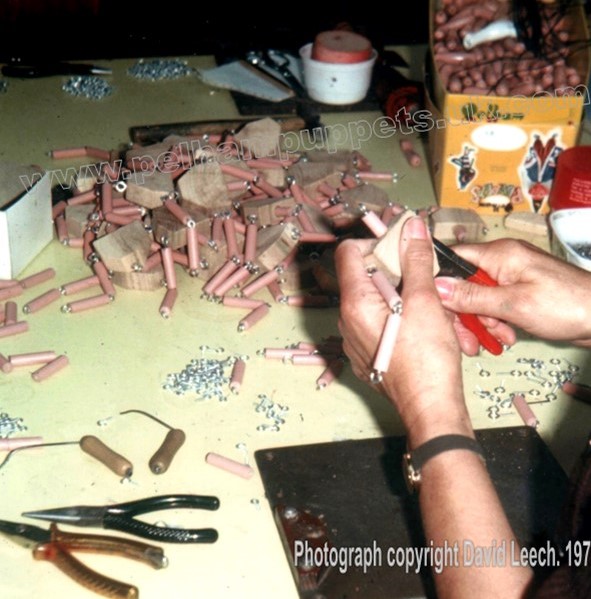
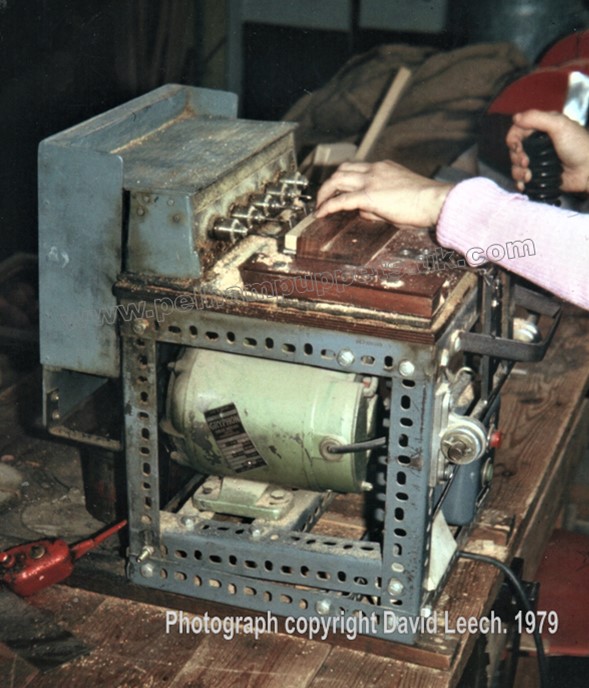 Have you ever wondered how all the holes were drilled for the thousands of controls were produced? Each control bar required at least seven holes and in the first year or two, these were drilled individually. Since up to five holes in a row were required in a single strip of timber, a purpose built five-chuck drill was designed and used to speed up this process.
In the photograph you can see how several control bars could be clamped together and all five holes drilled simultaneously.
Other machines, such as sanding discs and wire brush ‘finishing’ discs were found in the machine room, so at times it could become a very noisy and dusty place to work in.
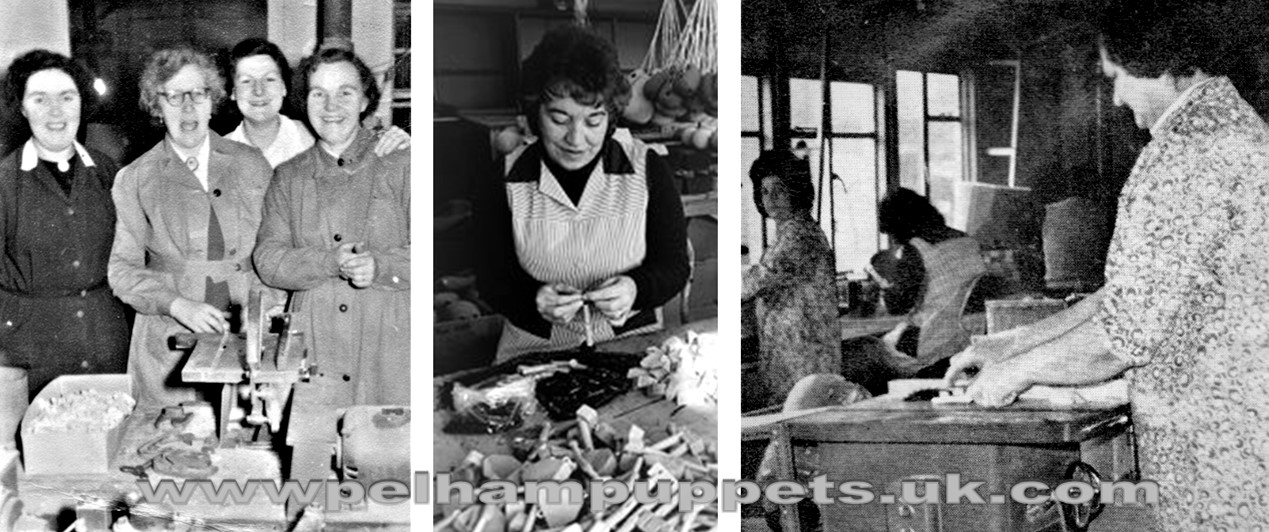
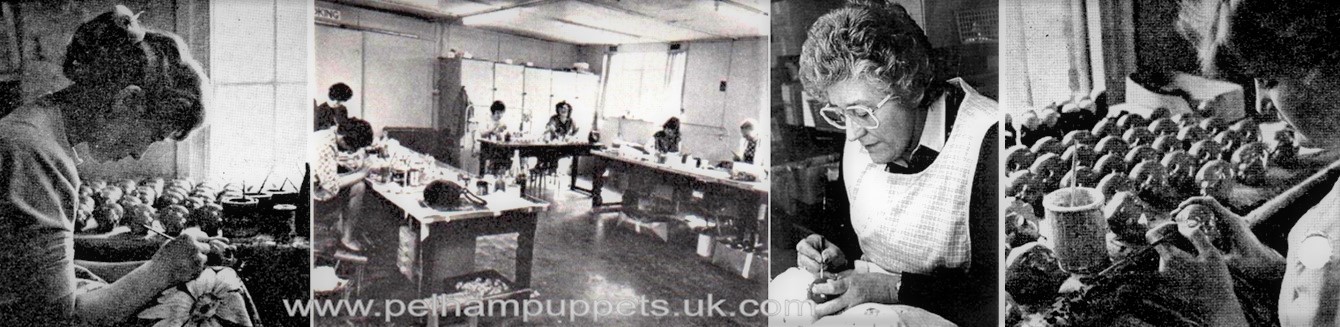
Photos above: Left: Jess Loney, Beryl Hawkins, Maggie Smart and Josie Rodda. (1954) Centre: Pam Clements assembling top bodies for Bimbo (1982) Right: A view of the Machine Room in 1973. Looking at the camera is Ruth Smith, next to her, probably dilling feet (domes) is Pam and on the circular saw is Iris Sheekey. Look how close her hands are to the fast revolving blade! She would cut hundreds of small wooden parts for several hours and at great speed – the “secret” was always to focus on the blade, never take your eyes off what you are doing, you could find your fingers on the floor!
The Assembly Room overlooked the River Kennett and during summer months, when the windows were open, you could hear the ducks on the river quacking to the beat of hammers tapping as hundreds of legs were being assembled and attached to the bottom bodies.
In the Assembly Room, as you see in the photographs (above) you would find a group of ladies sitting at large tables piled high with hundreds of puppet bodies, legs, and feet and stacked into boxes. In the left photo Mrs Lanfear (on the left) was the maker of controls. The photo on the right shows Maggie Smart and Audrey Chapman making sure the puppets do not “play football.” They are assembling legs and have to make sure the knee joints do not flip forward but lock when they straightens out.
 Top bodies had their arms attached and bottom bodies had their legs and feet attached. Puppets with ‘double barrel’ plastic legs were assembled here too, although much of the assembly work was done by people working from their homes. Puppet heads and hands were not attached to the bodies until after the costumes had been added.
The ‘SM type’ heads were had their jaws attached here too. The black and white photograph, taken around 1962, shows the pivot being inserted through the cheek and jaw then secured with a tap of the hammer and the nail head covered with wood filler and sanded smooth before going to the head painter’s room.
 The photo on the right shows arms being attached to the ‘SM type’ top body. Note the ‘twiddlers’ (above the pliers on the bench top,) these were made from puppet horse legs and bicycle spokes and were used to twist the hooks and eyes into the arms and bodies. The metal plate below the worker’s hands is a set-jig that was used to ensure all the metal leg joints were set to the correct depth when inserted into the dowelling.
All the wooden parts had to be sanded down to remove sharp edges and corners. In view of the vast quantities involved, huge tumblers were built, large barrels, eight feet wide and six feet in diameter with several compartments, operated by electric motors, which tumbled all the parts round, saving endless hours of tedious and monotonous labour.When the tumblers were operating, they sounded like an army of troops marching along a cobbled street. So they were housed in a small partly sound-proofed room in between the assembly room and the machine room. The original tumblers reflecting Bob’s flair for invention, comprised of empty fuel drums and, as he once said, ‘my grandfather’s bicycle!’

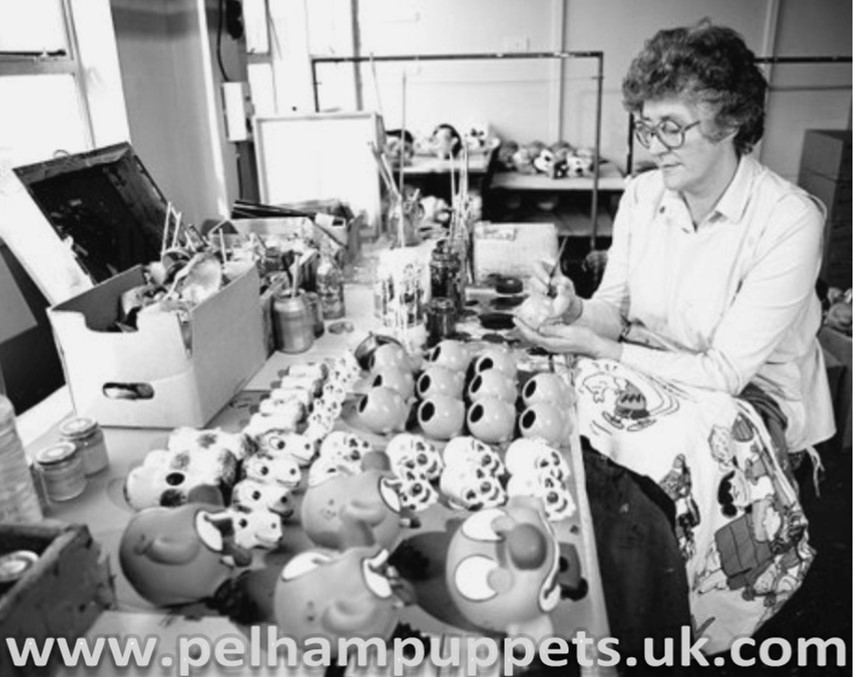
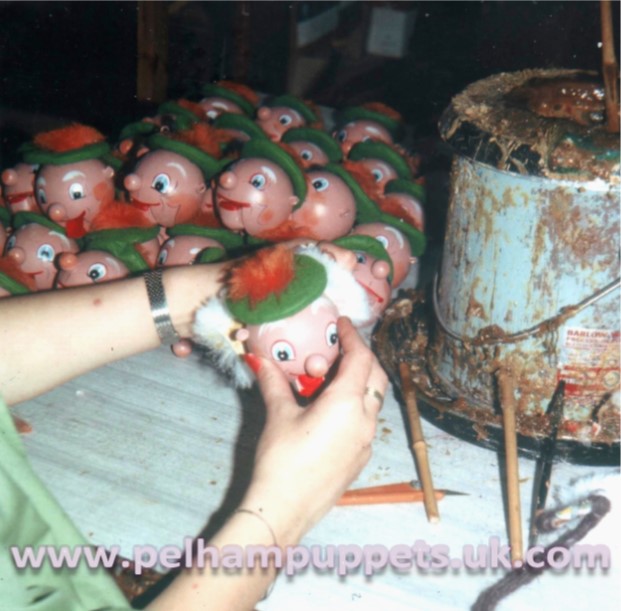
Up to 20 girls could be found hand painting all the puppet heads. The training that Gil Leeper had initiated in the early fifties was carried through from one employee to another and a standard programme of progressive painting was developed and followed by each newcomer. It would take up to six months to train a person for face painting and they must already have had a flair for painting. By the mid-seventies over 120 different characters were in production at any one time and up to 2,000 puppets a day were being produced, so head painting had to be done quickly and accurately.
 Training usually started with animal bodies, such as the cat and Bengo or large areas like the black area on Mickey and Minnie Mouse heads. They then progressed to painting features on moulded heads, usually starting with skeletons and puppet heads with larger features like the SL Frog and Giant. Finally, when competent, they progressed to the wooden ball heads or SS Type puppets. To help speed up the process, metal masks were produced with the position of the eyes and mouth cut out, so these could be lightly pencilled in to guide the painting of these features. Each head painter could usually recognise their own work, as Yvonne Rautenbach related, “No-one else may have noticed the difference but we all knew our own work. Even now, forty five years later, I would recognise a head I had painted all those years ago.”
 Americans particularly appreciated the quality of hand made, hand painted products that Pelham achieved world wide recognition for. Whereas dolls tended to be turned out from the same moulds and appear in toy shops, sitting in rows, each one identical to its neighbour, no two puppets ever turned out looking exactly alike. Bob recalled one occasion when he was showing an American buyer around the factory, when one head painter, (perhaps because of nervousness due to being watched,) made a slight slip up with her paint brush. Bob apologised for the error explaining that during training especially, some heads were either rejected or returned to the dipping room. However, the buyer responded by insisting that every puppet should have a “misplaced stroke of the brush” to highlight the fact that each and every puppet was genuinely painted!
 Sylvia Fry recalled that when she began to work at the puppet factory in September 1949 she was trained as a head painter. She described Victoria House as “just the right kind of building with its rickety old stairs for the type of work that was carried on there.” Later when the factory moved to Elcot Lane and then to London Road, she worked in the office for a few years until she got married. She went on to say, “Mr Pelham owned a cottage in Devon and as a wedding present, he let us stay there for a week and when we arrived at the cottage there was a bottle of champagne, chocolates and flowers! He was a very kind and generous man,” she said. “As soon as I was able to, I did some work from home, painting faces until such time as I could return to the factory full time. Bob wasn’t like any other boss, the work force didn’t feel nervous of him which is all too often the case in other places of employment. He would potter around doing anything creative, either working on new characters or even working on day to day production when pressure of work demanded it.”
The spirit that existed among the workforce was such that they would have done anything for him. Many of the other long-standing employees echoed Sylvia’s feelings about the time they worked at Pelham Puppets, “Those thirty two years were just marvellous, I couldn’t imagine working anywhere else!
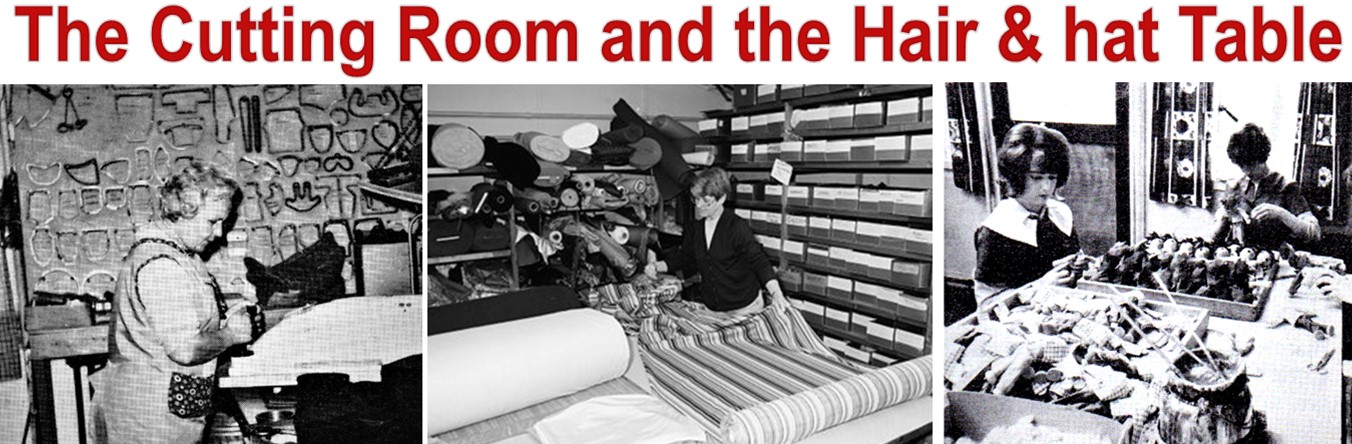
The photograph on the left, shows Megan Long operating the cutting press. The centre photo is of Cess Harris preparing fabric for the press and the photo on the right is of the Hair and hat table. Note the glue pot in the foreground.
 Once the faces had been painted, the heads were taken to the hair & hat table. Almost all the puppets needed a wig or a hat or both and these were glued and nailed on. Beads of bone glue were mixed with water in an electrically heated container. The glue would harden as soon as it began to cool, so the job had to be done quickly and the hair pressed down onto the glued head before it became cold. The photograph shows MacBoozle having his hair and hat glued on. Puppets with wooden heads generally had their hats nailed into place. The pot on the left of the photograph contains the heated (and very smelly) fast-setting glue.
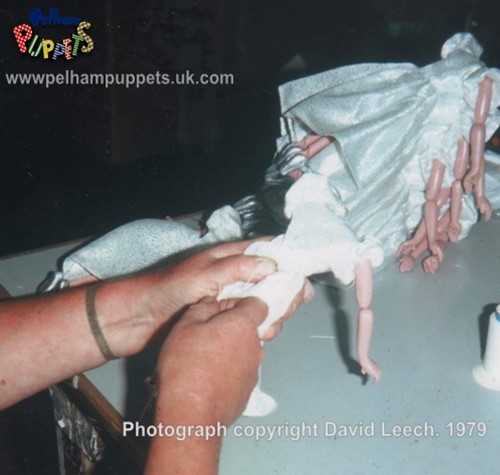 Once the hair and hats had been attached, they were handed over to the Dressing Table where the heads and hands were the added to the dressed bodies. The bodies had been brought over in boxes from the Assembly Room and the costumes had been brought in from the Sewing Room.
Next door to the Hair and Hat table was the Cutting Room. This is where the fabric for puppet clothes was cut to shape and size ready for sewing. To ensure uniformity to the cut of each outfit purpose made cutting knives shaped into the required patterns were used. On the wall at the back of the photograph, you can see some of cutting knives which made it possible for up to 16 patterns to be accurately cut, at a time. Folded fabric was placed on to the base plate of the cutting press, with the cutting knife placed into position. The white top-plate was swung into position and with the push of a button the pattern was stamped out with 1,000lbs per square inch of pressure. Various types of fabric were selected. Often, Bob would buy pattern books from fabric suppliers or ‘end of rolls’ which of course, was a cost effective way to purchase good quality materials suitable for the puppets.
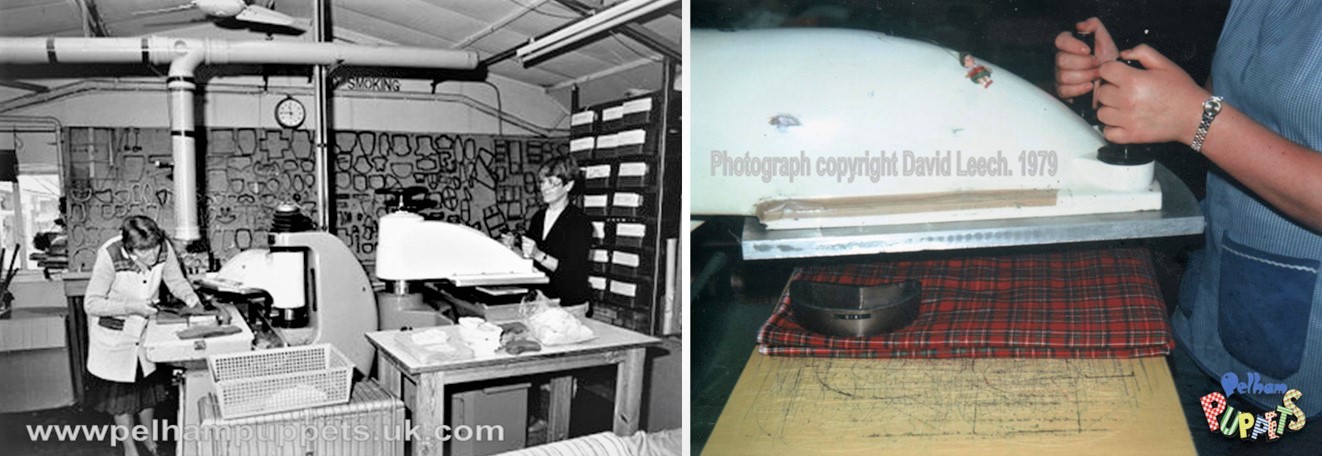
Photos above: Helen Fry and Cess Harris using the cutting presses and a close up of the press.
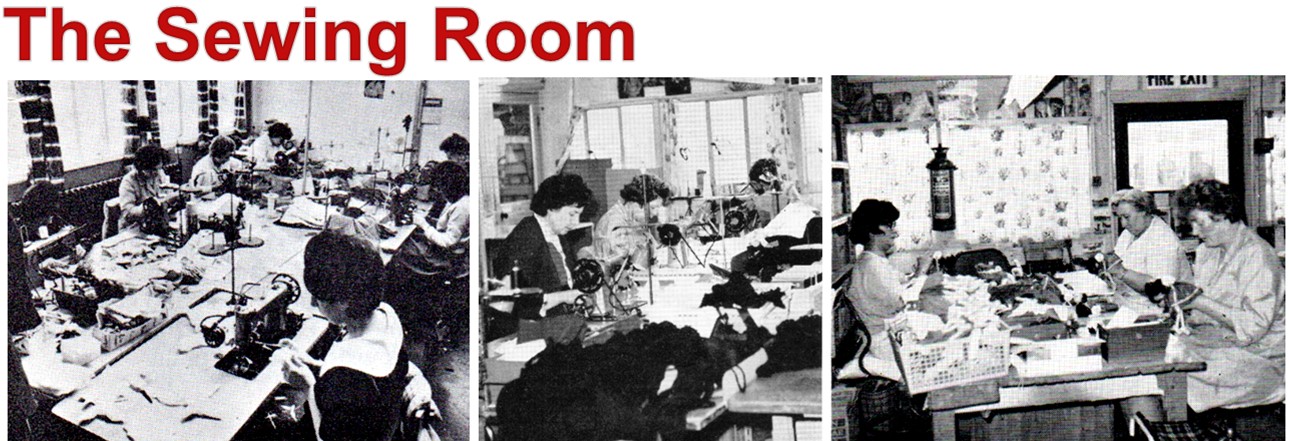
Photos above: Left and centre: the sewing room. Right, the costumes are sewn onto the puppet bodies. On the right of the photo, (in the white top) is Jane Clements who was the wife of Frank Clements one of Bob’s first employees. Sitting next to her is Betty Watts, her husband Michael was in charge of the factory workshop and maintenance of all the machines and tools used in the factory.
By 1978 there were fourteen industrial sewing machines in the sewing room, in constant use as well as eight ‘in-house’ finishers and dressers who completed the sewing by hand.
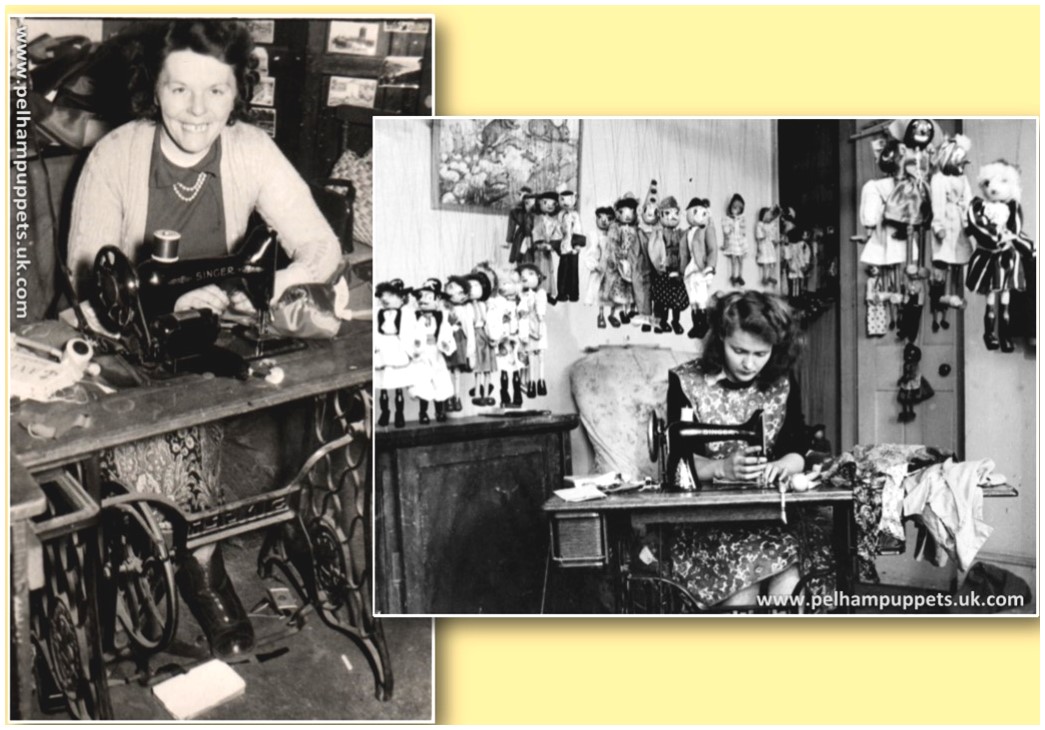 Doris Birley spent all her working life at the puppet factory from 1948 sewing puppet costumes. She recalled, “We didn’t have dozens of sewing machines in those days,” she said, “Everything was cut by hand and we only had one sewing machine, so a lot of the sewing was done by hand too!” The photographs (right) show Laura Ray in 1947 and Doris in the mid 1950s – each using the same sewing machine about eight years apart! “I remember Mr Pelham wanted me to make a puppet of a soldier with a khaki uniform but we didn’t have any suitable material in stock,” recalled Doris Birley, “that is, until I took my husband’s old army shirts in to him! They were cut up and used too!” Attention to detail was of great importance to Doris and her co-workers, but in time, some of the finishing and ‘finicky bits’ were omitted due to the pressure involved in producing ever-increasing quantities.
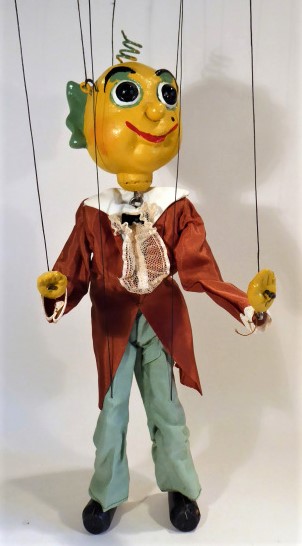
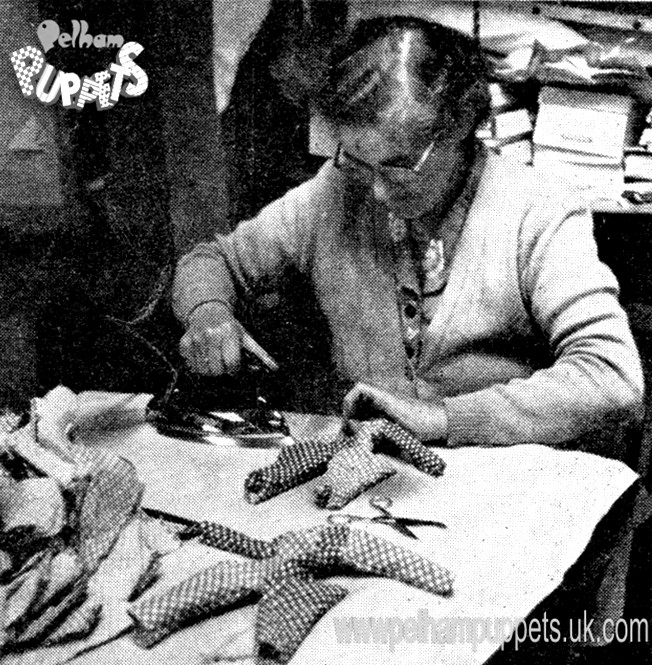 For example, the small ruffles on Mr Turnip’s shirt and those from the 50’s were made from silk tule, like the netting also used for women’s underskirts. Later it was nylon, like net curtain, which you see on Prince Charming and the SL Queen. Most of the plain coloured fabrics that were used like the white, green, yellow, black, red and blue was called silk meracain, it was very similar to the parachute silk they used in the early days. The velvet used was called cotton velveteen. The velvet pile was shorter than normal velvet and far easier to work with. On the Fairy and Ballerina they used organza and acetate lining fabric, which was also used on Cinderella and Prince Charming. The photo shows Mrs Page (in 1961) ironing the costumes.
 Which ever type of fabric was used, the important thing was that the fabric had to be fluid enough to allow the puppet to move freely and, whilst the fabrics changed time and time again, the cut of each outfit very rarely did. Once the costumes had been cut and sewn, they were turned, pressed and dressed and taken to the Dressing table.
At this point, heads met bodies under the supervision of the factory forewoman, Joan Brown and the puppets finally became recognisable characters and were then piled up on large trays and taken through to the stringing room. The photo shows Joan in 1966 with Muffin the Mule puppet in the foreground.
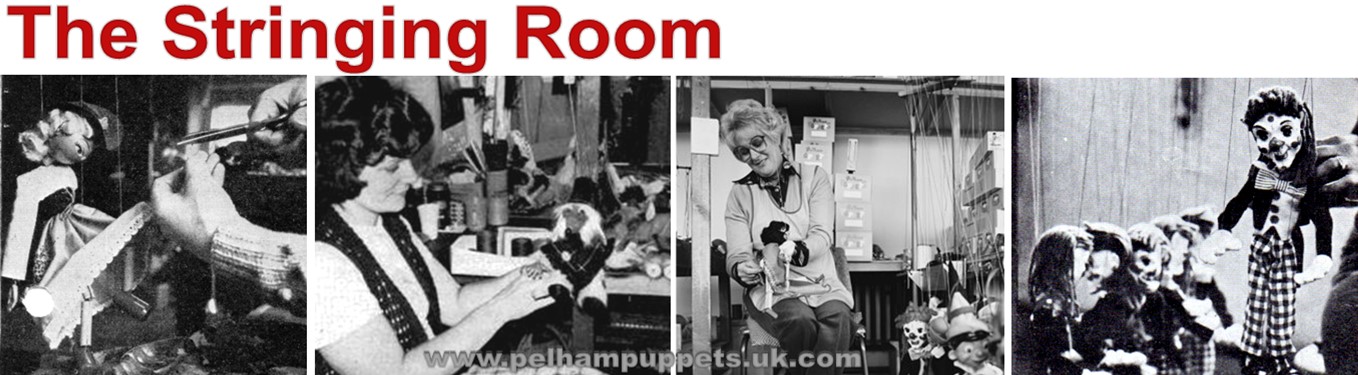
 One of the most distinctive and unique features that identifies a marionette as a Pelham Puppet is the control and method of stringing which was originally designed with the expert help of Jan Bussell in 1947. To begin with, the puppets had all black strings and it was from 1955 that the colour strings and anti-tangle buffers were added.
There were up to ten people continually stringing puppets as well as the many home-workers who would be called upon when extra help was needed. Eileen Sims-Neighbour headed up the stringing room and assigned the work to meet the targets from the production sheets that specified how many and what puppets were needed each week. In the late 1970’s there would be 1,000 Pinocchio puppets on every weekly production sheet! Eileen started working for Pelham Puppets in 1948 and alongside her, Pam Waite and Jenny Crook were two other long standing ’stringers’ who stayed with the Company for over 25 years.
 Generally, two people would do the head stringing, that is attached the head strings only so that the rest of the team could concentrate on attaching the strings to the back, shoulders and limbs. The head strings were cut on a special board so that they were all exactly the same length. Once the puppet was hanging from its head strings, the control was clamped to a stand so that the coloured strings could be attached to the back, shoulders, (for type SM,) and limbs.
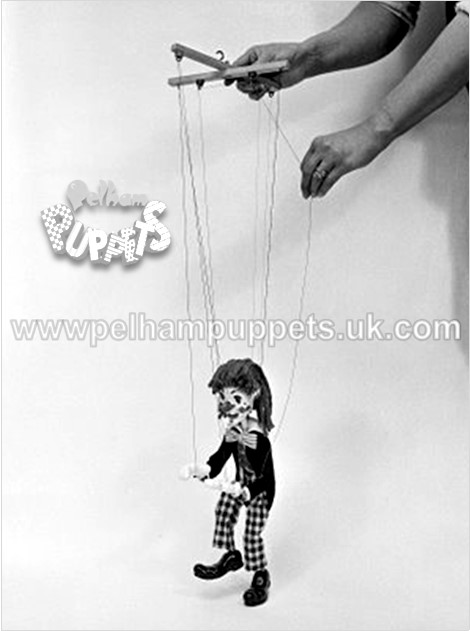
An experienced stringer could complete about 12 to 15 standard puppets every hour, although characters like MacBoozle, the skeleton, Clever Willie and Mother Dragons would take longer due to their extra strings. In addition, many puppets were strung and boxed by homeworkers who were paid for the number of puppets they completed. The photo shows how to make a puppet walk which was used in a sales leaflet around 1966.
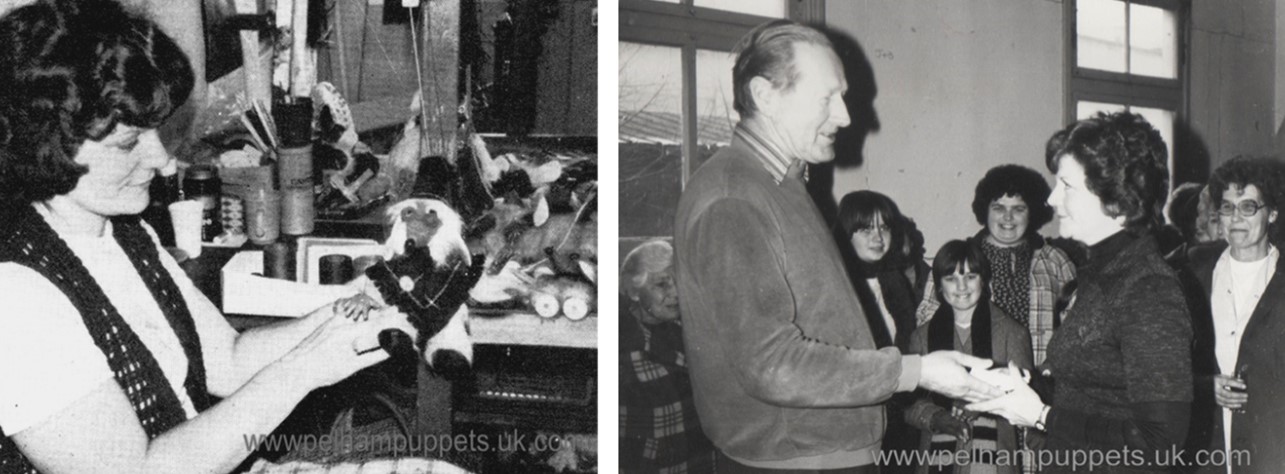
Photos above: Pam Waite stringing Wombles in 1975 and Mr Pelham (Dec 1977) handing Pam her anniversary gift in recognition of 25 years service. (with families of employees looking on.)
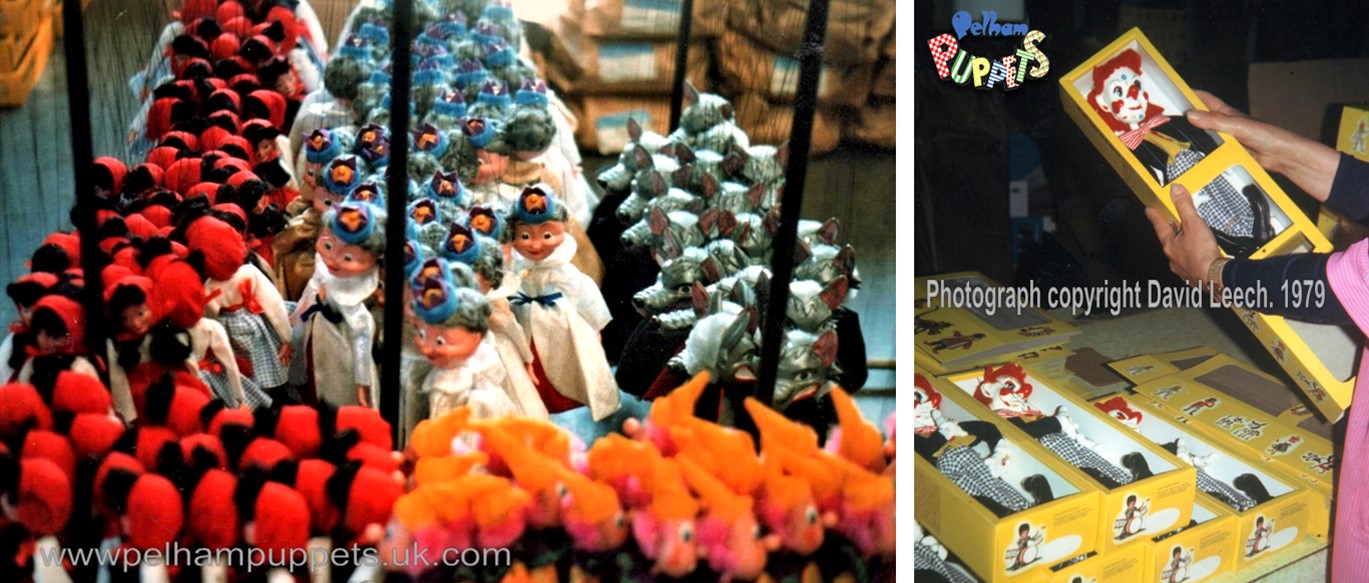
In the centre of the room, there was a long table where two people made up the boxes and packed the puppets and stacked them in the nearby production room where, the following morning, they were all counted by staff from the packing and despatch room, so that the previous day’s production could be recorded.
To continue the Factory Tour, ‘turn’ to Page Two here.
To return to the top of the page, click here.